Understanding Finish Trim: Types, Styles, and Applications
Finish trim is an essential component in residential carpentry, acting as the visual and functional transition between different surfaces, such as walls, floors, ceilings, and fixtures. Its purpose extends beyond decoration; it provides a polished look, ensures that gaps are concealed, and enhances the overall aesthetic harmony of a space. When selecting and installing finish trim, such as baseboards, crown moulding, or door casing, precision and attention to detail are paramount to achieving a high-quality, professional appearance.
For those embarking on a remodeling project or new construction, understanding the various types, styles, and applications of finish trim is foundational. This comprehensive guide covers everything from common trim types to tips for optimal installation and finishing. Whether you’re a homeowner, DIY enthusiast, or professional contractor, mastering finish trim techniques will elevate your craftsmanship and ensure stunning, durable results. If you’re interested in sourcing top-tier materials for your projects, visit Finish trim for reliable options and expert insights.
Common Types of Finish Trim for Homes
Finish trim encompasses a variety of moldings and styles designed to complete and embellish interior spaces. Each type serves a specific purpose and can dramatically influence the mood and style of a room.
Baseboards
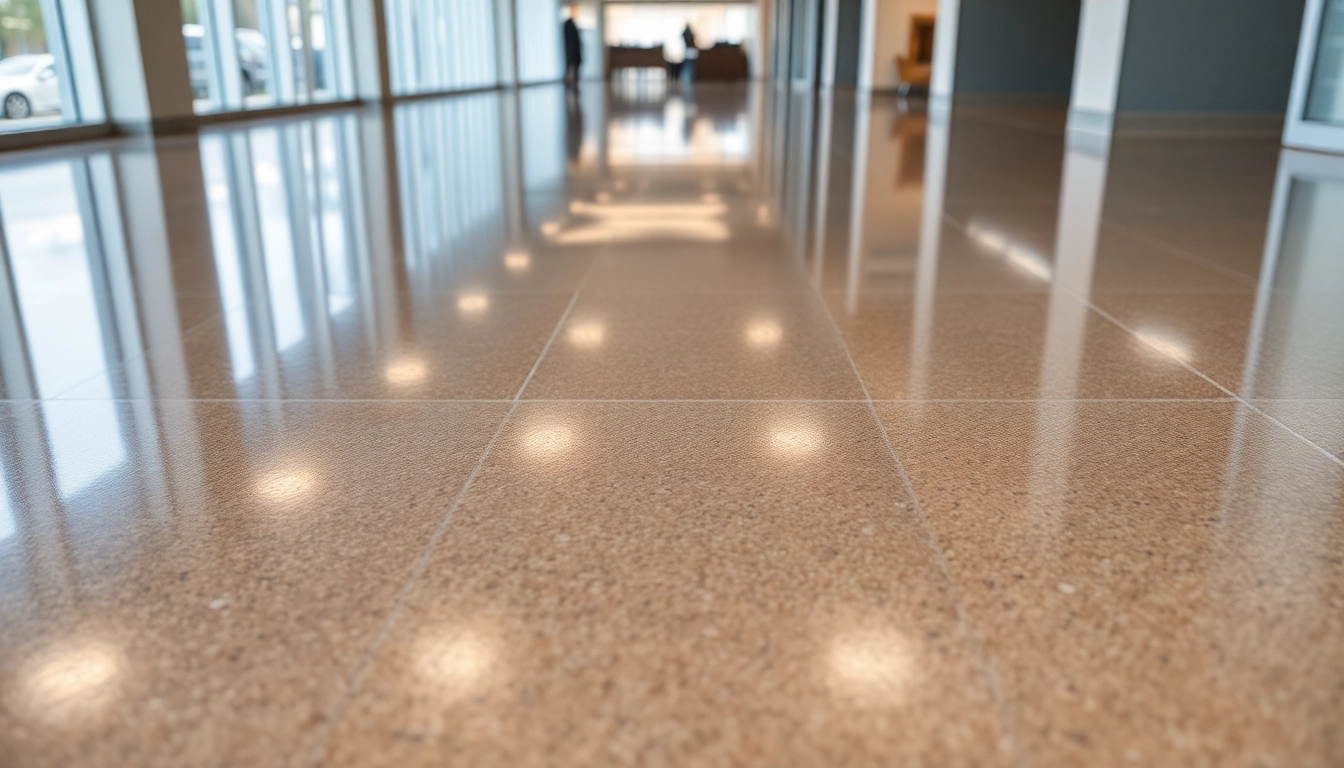
Baseboards run along the bottom of interior walls, bridging the gap between the wall surface and flooring. They not only obscure any imperfections or gaps but also protect walls from furniture bumps and cleaning tools. Available in various profiles and heights, baseboards can be plain and functional or ornate and decorative, depending on design preferences.
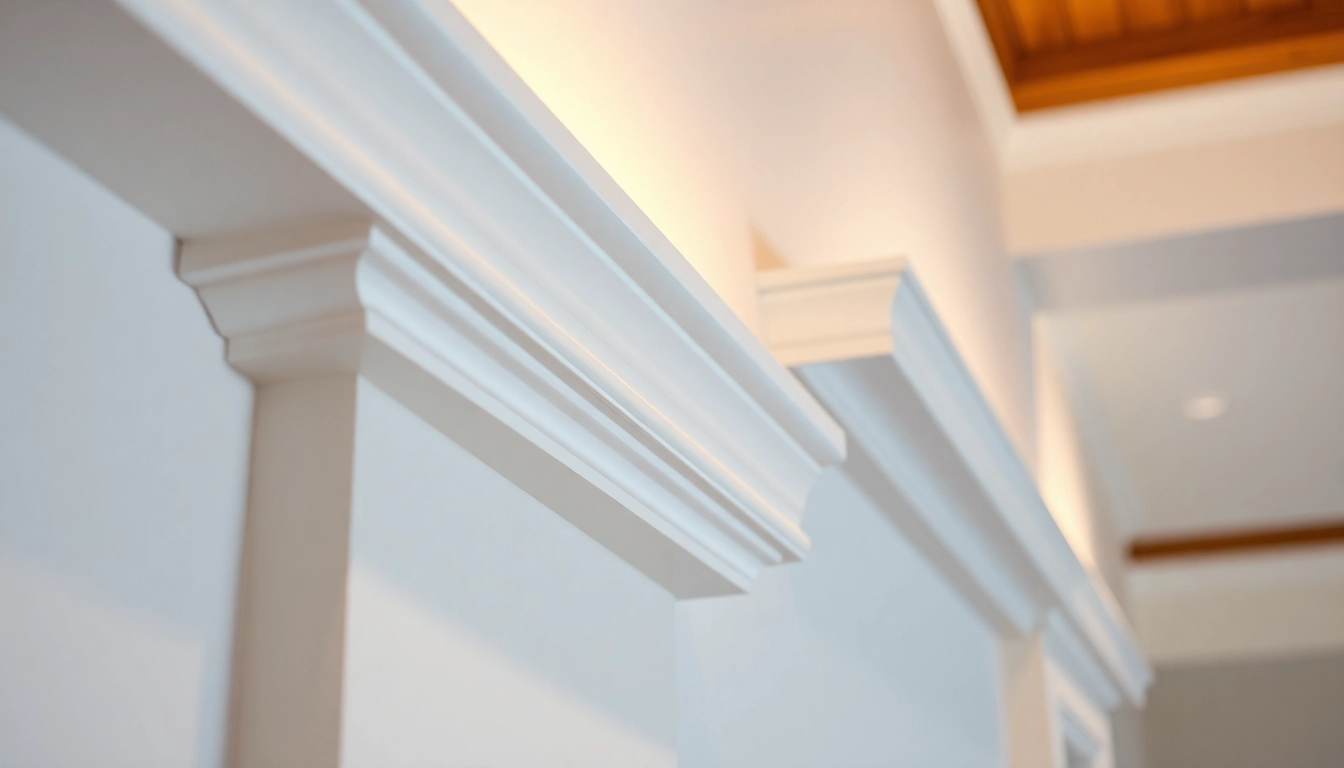
Crown Moulding
Crown moulding is installed at the intersection of walls and ceilings, adding elegance and sophistication. It can be simple or elaborate, made from wood, plaster, or polyurethane, and is often used to accentuate high ceilings or define a room’s architectural style.
Door and Window Casings
Casings frame doors and windows, providing a clean border that conceals gaps between the frame and wall surface. They can also be styled to match other trim elements, creating a cohesive look.
Quarterround and Shoe Moulding
These smaller trims are typically placed at the junction of baseboards and flooring, providing a smooth transition. They are often used to cover gaps or irregularities and add subtle detailing.
Specialty and Decorative Moldings
For a more customized or ornate appearance, options like chair rails, picture rails, or intricate decorative mouldings can be integrated into the interior design.
Popular Styles and Design Considerations
Selecting the right style of finish trim entails understanding the overall design language, space function, and personal taste. Styles range from traditional to modern, with variations in profile, material, and finish.
Traditional vs. Contemporary
Traditional trim styles often feature detailed profiles, intricate carvings, and elaborate mouldings. Think of crown moulding with multiple layers or heavily detailed baseboards. Conversely, contemporary trim emphasizes clean lines, minimal profiles, and smooth surfaces, creating a sleek and modern look.
Material Choices
Materials influence durability, appearance, and cost. Wood remains the classic choice, offering warmth and authenticity, but alternatives like MDF, polyurethane, or PVC provide moisture resistance and easier installation. Selecting the appropriate material depends on room function, exposure to moisture, and desired aesthetic.
Profiles and Dimensions
The profile—how a moulding’s cross-section appears—significantly impacts the room’s character. Larger, more ornate profiles convey grandeur, while slimmer profiles suit minimalist designs. Consider room height; taller ceilings often complement more substantial trim profiles.
Color and Finish
While trim is traditionally painted white, modern trends incorporate bold colors, stains, or natural wood finishes to match or accentuate other design elements. High-gloss or satin sheens are popular options for a polished appearance.
Choosing the Right Finish Trim Based on Room and Purpose
Each room’s function and ambiance should guide trim selection. For example:
- Living Rooms and Formal Spaces: Opt for ornate crown moulding and tall baseboards in rich wood finishes to create an elegant atmosphere.
- Bedrooms: Consider subtle, simple profiles that add warmth without overwhelming the space.
- Bathrooms and Kitchens: Choose moisture-resistant materials like PVC or treated wood, with minimalist designs to facilitate cleaning.
- Basements and Utility Rooms: Prioritize durability and low maintenance, such as MDF or PVC trims.
Additionally, the scale of the trim should match ceiling height and room size. Taller ceilings can carry more substantial mouldings without dominating the space, whereas smaller trims preserve a light and airy feel in lower-ceiling rooms.
Effective planning and precise measurement are crucial, particularly when matching existing trim or creating a cohesive visual flow across multiple rooms.
Essential Tools and Materials for Superior Finish Trim Installation
Recommended Saws, Miter Tools, and Adhesives
Achieving professional-quality finish trim begins with the right tools:
- Compound Miter Saw: Essential for precise angled cuts, especially for corners and joints. Dual-bevel models allow mitering both sides without flipping the workpiece.
- Coping Saw or Jigsaw: Useful for intricate cuts, coping joints, or adapting trim to irregular wall angles.
- Nail Gun or Finish Nails and Hammer: Finish nailers facilitate quick, clean fastening, minimizing nail hole gaps and reducing hand fatigue.
- Adhesives: Construction adhesives or wood glues improve stability, especially on floating or decorative elements.
- Level and Tape Measure: For ensuring accurate alignment and measurements.
Investing in quality tools reduces errors, enhances safety, and ensures a smooth workflow. Consider brands and features like laser guides or adjustable settings for best results.
Quality Paints, Stains, and Protective Finishes
The final appearance of your finish trim is highly dependent on the finishing products used:
- Paints: Latex-based paints, especially those with high adhesion and stain resistance, are recommended. A semi-gloss or satin sheen balances aesthetic and durability.
- Stains and Finishes: For natural wood looks, use quality stains followed by a clear polyurethane or varnish to protect against wear and moisture.
- Caulks and Sealants: Water-based or latex caulks provide a flexible seal at joints, preventing cracking and gaps.
Using high-quality paints and finishes not only enhances the visual appeal but also prolongs the lifespan of your trim, reducing maintenance needs over time.
Preparation Tips for Clean and Precise Work
Proper preparation is paramount for a flawless finish:
- Ensure walls are smooth, clean, and dry before installation.
- Accurately measure and mark cut lines, double-checking with a level.
- Use painter’s tape on adjacent surfaces to prevent paint or stain overspill.
- Pre-finish trim pieces with primer or paint to streamline the process.
- Plan layout thoroughly to minimize waste and adjustments.
Taking these preparatory steps helps achieve sharper angles, cleaner joints, and overall superior appearance.
Step-by-Step Guide to Installing Finish Trim with a High-Quality Finish
Measuring, Cutting, and Fitting Techniques
Precision begins with careful measurement:
- Measure wall lengths accurately, adding extra for miter cuts and overhangs.
- Cut trim at 45-degree angles for corners, ensuring tight joints. When fitting around irregular angles, coping joints instead of mitering can produce a cleaner look.
- Use scrap scraps to test angles and fit before final cutting.
When installing, position pieces snugly against the wall, with joints aligned properly for a seamless appearance.
Proper Nailing, Caulking, and Sanding Methods
Secure the trim using finish nails, spaced appropriately (usually 16 inches on center for studs), and countersink the nails for the best finishing surface.
- Apply a thin layer of wood filler or wood putty over nail holes.
- Caulk joints and gaps with a quality, paintable caulk; smooth with a damp finger or caulk tool for neatness.
- Sand lightly after caulking and filler dry to achieve a smooth surface.
Precision in these steps prevents visible imperfections that compromise the final look.
Finishing Techniques for a Smooth, Professional Look
The finishing phase involves meticulous sanding between coats, proper primer application, and multiple layers of paint or stain:
- Start with fine-grit sandpaper (220 grit) for a silky-smooth surface.
- Apply primer suitable for the finish product to ensure adhesion and uniform color.
- Use high-quality brushes or rollers, and apply multiple thin coats rather than thick coats.
- Finish with a clear protective topcoat (if desired) for added durability.
Taking your time at every stage ensures crisp lines, even color, and a high-end finish that mimics professional work.
Best Practices for Painting and Finishing Finish Trim
Optimal Paint Types and Sheens for Trim
The choice of paint and sheen significantly impacts appearance and maintenance:
- Sheens: Satin, semi-gloss, or high-gloss finishes are preferred for trim due to their durability and ease of cleaning.
- Paint Types: High-quality latex paints are favored for their flexibility, low odor, and ease of application. Oil-based paints, while more durable, have longer drying times and stronger odors but can offer a smoother finish on certain surfaces.
For an optimal finish, select paints formulated for trim, with excellent adhesion and fade resistance.
Steps for Sanding, Priming, and Applying Multiple Coats
Proper application sequence is essential:
- Sand all surfaces to remove rough edges and raise grain for an even surface.
- Apply a stain-blocking or bonding primer, especially if changing colors or covering previous finishes.
- Use quality brushes or sprayers to apply thin, even coats of paint or stain.
- Allow adequate drying time between coats, lightly sanding between coats for a smoother finish.
- Apply additional coats as needed to achieve the desired color depth and coverage.
Patience and precision during finishing yield visible results in the form of crisp edges and a flawless appearance.
Tips for Avoiding Common Finishing Mistakes
- Avoid applying thick layers—layering thin coats produces a more even and durable finish.
- Prevent runs and drips by maintaining a wet edge during application.
- Always prime new or bare wood surfaces to prevent tannin bleed or uneven color.
- Keep brushes and rollers clean to avoid introducing debris into the finish.
Regularly inspecting your work helps catch issues early, ensuring a professional look.
Maintaining and Enhancing Your Finish Trim Over Time
Cleaning and Touch-Up Strategies
Routine cleaning preserves the beauty of your finish trim:
- Dust regularly with a soft cloth or vacuum with a brush attachment.
- Use a damp cloth with mild soap for stubborn stains; avoid harsh chemicals that can damage finishes.
- Inspect periodically for chips, scratches, or peeling paint, and promptly touch-up with matching paint or stain.
Touch-up kits and small brushes are handy for quick repairs, keeping your trim looking fresh.
Weatherproofing and Sealing for Longevity
Protect outdoor or moisture-prone interior trim by applying sealants or water-resistant finishes:
- Use polyurethane or varnish for stabilized durability and scratch resistance.
- Consider applying a clear sealant over painted trim for added protection in kitchens, bathrooms, or exterior areas.
- Ensure proper ventilation during application to avoid fumes and ensure proper curing.
Upgrading or Customizing Existing Trim for a Fresh Look
Over time, existing trim can be refreshed by:
- Sanding and repainting with modern colors or glazes to update the style.
- Adding decorative elements like view mouldings, rosettes, or custom profiles to enhance architectural interest.
- Replacing worn-out or damaged sections with matching or contrasting trims for visual interest.
Upgrading your finish trim can significantly boost your home’s aesthetic appeal and property value.